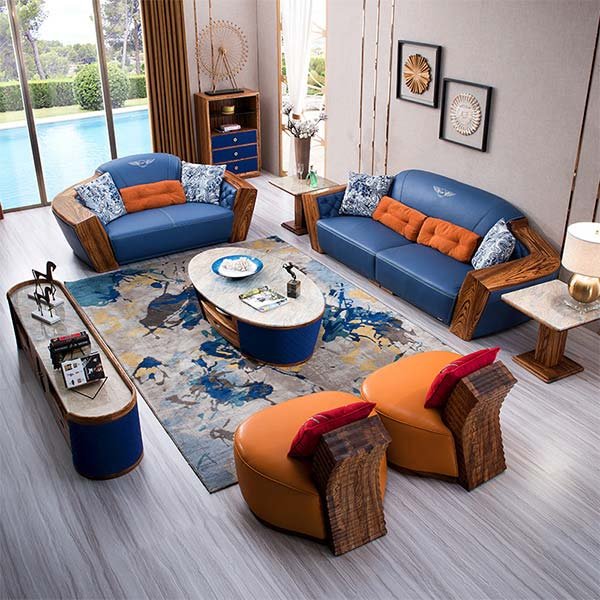
“Transform your furniture with ease using the art of chalk paint!”
Choosing the right furniture for chalk painting
Choosing the right furniture for chalk painting is an important step in achieving the desired results. Chalk paint has gained popularity in recent years due to its versatility and ability to transform old furniture into beautiful, shabby chic pieces. However, not all furniture is suitable for chalk painting. In this article, we will discuss some factors to consider when choosing furniture for chalk painting.
Firstly, it is important to select furniture that is made of a suitable material. Chalk paint adheres best to porous surfaces such as wood, wicker, and metal. Avoid furniture with a glossy or sealed finish, as the paint may not adhere properly. Additionally, furniture with intricate carvings or details may require more time and effort to paint, so consider your skill level and the amount of time you are willing to invest in the project.
Secondly, consider the size and shape of the furniture. Chalk painting can be a time-consuming process, so it is important to choose furniture that you will enjoy working on. Large pieces of furniture, such as dressers or dining tables, can be challenging to paint and may require more paint and supplies. On the other hand, smaller pieces, like side tables or chairs, can be completed more quickly and are great for beginners.
Another factor to consider is the condition of the furniture. Chalk paint can be used to cover up imperfections, but heavily damaged or warped furniture may not be suitable for painting. Inspect the furniture for any structural issues or damage that may affect the final result. It is also important to clean and prepare the furniture before painting. Remove any dirt, grease, or old paint to ensure proper adhesion of the chalk paint.
Additionally, consider the style and aesthetic of the furniture. Chalk paint works well with vintage, rustic, and shabby chic styles. Consider the overall look you want to achieve and choose furniture that complements your desired aesthetic. Keep in mind that chalk paint comes in a variety of colors, so you can easily customize the furniture to match your personal style.
Lastly, consider your budget and the cost of the furniture. Chalk painting can be an affordable way to update furniture, but it is important to factor in the cost of paint, brushes, and other supplies. If you are on a tight budget, consider purchasing second-hand furniture or repurposing items you already own. Remember that chalk paint can transform even the most basic furniture into a unique and stylish piece.
In conclusion, choosing the right furniture for chalk painting is crucial for achieving the desired results. Consider the material, size, condition, style, and budget when selecting furniture for your project. With careful consideration and proper preparation, you can create beautiful, chalk-painted furniture that will enhance the aesthetic of your space. Happy painting!
Step-by-step guide to preparing furniture for chalk painting
Шаг за шагом: подготовка мебели для окрашивания мелкой краской
Перед тем как приступить к окрашиванию мебели мелкой краской, необходимо правильно подготовить поверхность. В этой статье мы рассмотрим пошаговое руководство по подготовке мебели для окрашивания мелкой краской.
Первым шагом является очистка поверхности от грязи и пыли. Используйте мягкую тряпку или губку, чтобы удалить все загрязнения с поверхности мебели. Переходя к следующему шагу, убедитесь, что поверхность полностью сухая.
Вторым шагом является шлифовка поверхности мебели. Используйте шлифовальную бумагу средней зернистости, чтобы удалить старую краску или лак с поверхности. Шлифовка поможет создать грубую поверхность, на которую мелкая краска будет лучше держаться. После шлифовки, удалите все пыль и остатки с поверхности.
Третий шаг – заполнение трещин и сколов. Используйте деревянную шпателю, чтобы заполнить все трещины и сколы на поверхности мебели. После заполнения, оставьте шпателюшку высохнуть и затем аккуратно отшлифуйте поверхность, чтобы сделать ее гладкой.
Четвертым шагом является нанесение грунта. Грунт поможет создать ровную и однородную поверхность для окрашивания. Используйте кисть или валик, чтобы равномерно нанести грунт на поверхность мебели. После нанесения грунта, дайте ему высохнуть полностью.
Пятый шаг – последний перед окрашиванием мебели мелкой краской. Перед нанесением краски, аккуратно отшлифуйте поверхность грунта, чтобы сделать ее гладкой и готовой для окрашивания. Убедитесь, что поверхность полностью сухая и чистая перед нанесением краски.
Теперь, когда мебель полностью подготовлена, можно приступить к окрашиванию мелкой краской. Нанесите краску на поверхность мебели с помощью кисти или валика. Работайте аккуратно и равномерно, чтобы получить гладкое и ровное покрытие. После нанесения первого слоя краски, дайте ему высохнуть полностью, а затем нанесите второй слой для более насыщенного цвета.
В заключение, подготовка мебели для окрашивания мелкой краской – это важный шаг, который поможет достичь профессионального результата. Очистка поверхности, шлифовка, заполнение трещин, нанесение грунта и окрашивание – все эти шаги необходимо выполнить тщательно и последовательно. Следуя этому пошаговому руководству, вы сможете успешно подготовить мебель для окрашивания мелкой краской и создать уникальный и стильный интерьер.
Tips and techniques for achieving a smooth and professional finish with chalk paint
Chalk paint has become increasingly popular in recent years for its ability to transform furniture and give it a unique, vintage look. However, achieving a smooth and professional finish with chalk paint can be a bit tricky if you’re not familiar with the right techniques. In this article, we will provide you with some tips and techniques to help you achieve the best results when using chalk paint on your furniture.
First and foremost, it’s important to properly prepare your furniture before applying chalk paint. This includes cleaning the surface to remove any dirt, grease, or wax that may be present. You can use a mild detergent and water solution for this purpose. Once the surface is clean, make sure to sand it lightly to create a smooth and even base for the paint to adhere to.
When it comes to applying chalk paint, it’s best to use a high-quality brush or roller. A brush with natural bristles will give you better control and help you achieve a smoother finish. Start by applying a thin and even coat of paint, working in small sections at a time. Avoid overloading the brush or roller with paint, as this can lead to drips and uneven coverage.
One of the great things about chalk paint is its ability to create a distressed or aged look. If you want to achieve this effect, you can use sandpaper or a sanding block to gently distress the painted surface once it’s dry. Focus on areas that would naturally wear over time, such as edges, corners, and raised details. This will give your furniture a charming, vintage appearance.
To seal and protect your chalk-painted furniture, it’s important to apply a topcoat. This will not only enhance the durability of the finish but also give it a smooth and polished look. There are several options for topcoats, including wax and polyurethane. Wax is a popular choice as it adds a soft sheen and can be easily applied with a cloth or brush. Polyurethane, on the other hand, provides a more durable and water-resistant finish. Whichever option you choose, make sure to apply it in thin and even coats, following the manufacturer’s instructions.
In addition to the techniques mentioned above, there are a few other tips that can help you achieve a smooth and professional finish with chalk paint. Firstly, make sure to work in a well-ventilated area to avoid inhaling fumes. Secondly, allow each coat of paint to dry completely before applying the next one. This will prevent the paint from smudging or peeling. Lastly, take your time and be patient. Chalk paint requires a bit of practice to master, but with time and practice, you’ll be able to achieve beautiful results.
In conclusion, achieving a smooth and professional finish with chalk paint is possible with the right techniques and a little bit of patience. By properly preparing your furniture, using high-quality brushes or rollers, distressing the surface if desired, and applying a topcoat, you can transform your furniture into a stunning piece with a vintage charm. Remember to work in a well-ventilated area and allow each coat to dry completely for the best results. With these tips and techniques, you’ll be able to create beautiful chalk-painted furniture that will impress everyone who sees it.
Заключение
Заключение о том, как покрасить мебель меловой краской:
1. Подготовьте поверхность мебели, очистив ее от грязи, пыли и старой краски.
2. Если необходимо, выполните ремонтные работы, заполнив трещины или сколы.
3. Покройте поверхность мебели слоем грунтовки, чтобы обеспечить лучшую адгезию меловой краски.
4. Приготовьте меловую краску, смешав ее с водой в соответствии с инструкциями производителя.
5. Нанесите первый слой меловой краски на мебель, используя кисть или валик. Дайте ему высохнуть полностью.
6. При необходимости, нанесите второй слой меловой краски для более насыщенного цвета или лучшего покрытия.
7. После полного высыхания краски, защитите поверхность мебели слоем защитного лака или воска.
8. Дайте защитному покрытию высохнуть и закрепиться в соответствии с инструкциями производителя.
9. При желании, добавьте декоративные элементы или акценты, чтобы придать мебели особый вид.
10. Наслаждайтесь обновленной мебелью, покрытой меловой краской, которая придаст ей стильный и уникальный вид.


